Introduction
Workspace One UEM (WS1 UEM) requires that each device is enrolled against a user, which ties an identity to a device. In certain use cases, a staging user may be required:
- Shared Devices – these are devices shared between multiple employees, often seen in the retail sector. When a device is enrolled with a shared user account, the device can be automatically assigned to the employee using the device by getting them to log in
- Enrolling on behalf of a user – Many IT teams are responsible for the initial setup and configuration of mobile devices, before handing them over to the end user. Enrolling as a staging user can remove friction from this process, by allowing IT to enrol a device as a particular user without needing to obtain their directory credentials. All that is required is the username of the user to enrol the device.
This post will walkthrough how to create a staging user to be used for enrolment on behalf of other users, to enable enrolment without requiring the end user’s directory credentials.
All screenshots on this page can be enlarged by clicking on the image.
What you’ll need
- Administrator access to Workspace One, with a role assigned that has access to create user accounts
- A password manager to store the staging user credentials – optional, but recommended for security purposes. Remember, this account can be used to enrol any user in Workspace One UEM, potentially opening the doorway for access to company data if exploited.
How-To
- Once logged into your WS1 UEM Admin console, navigate to Accounts > Users
- Click the Add button, then Add User
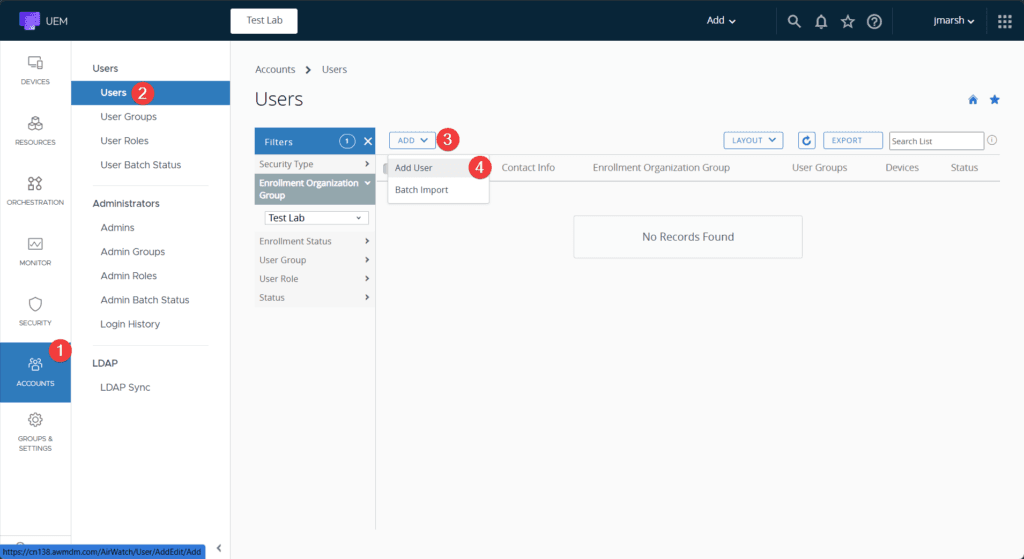
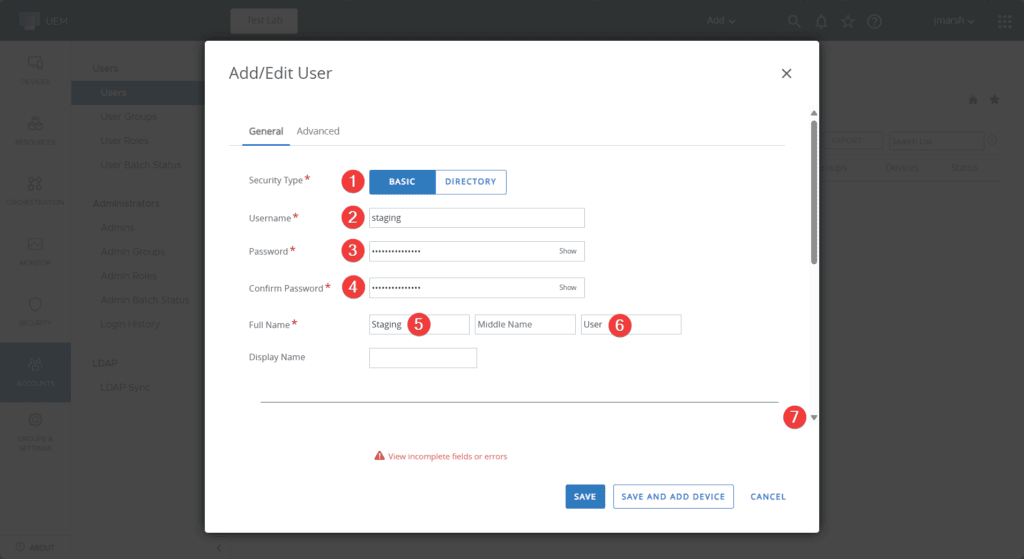
- Select Basic as the security type
- Fill in the mandatory fields:
- Username
- Password
- First & Last Name
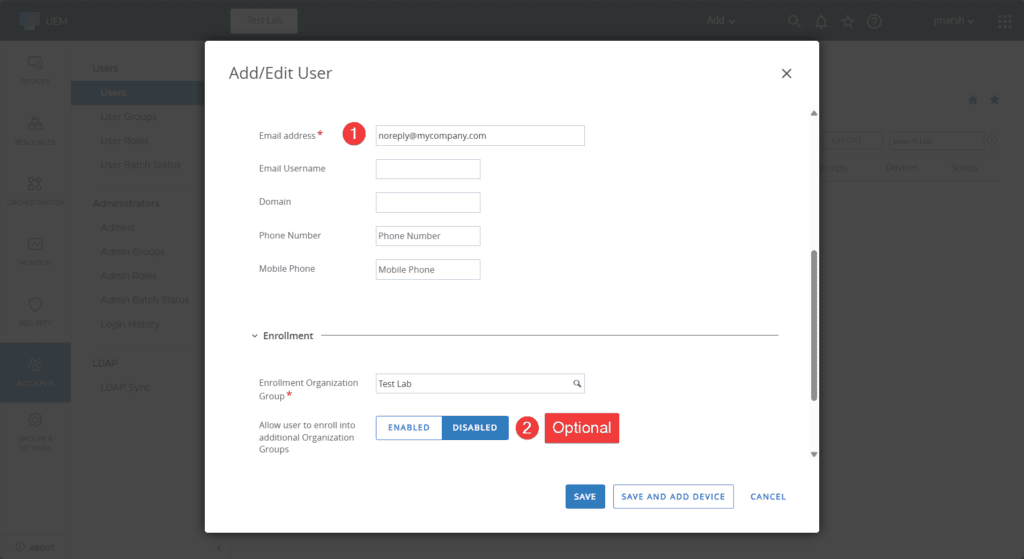
- Email Address – this can be made up, it’s not used in this particular use case
- Expand Enrollment & Notification sections to reveal additional fields
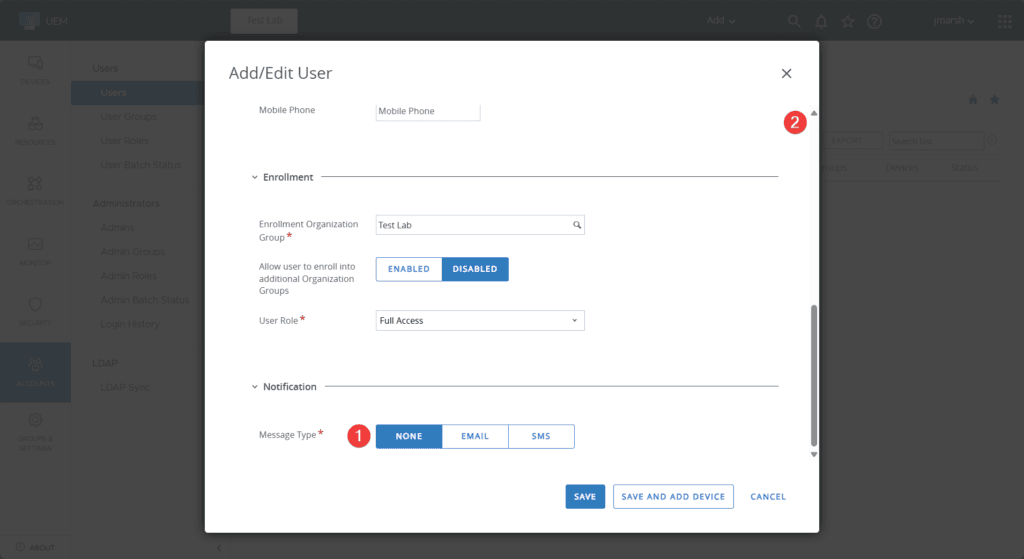
- Allow user to enroll into additional Organization Groups (OGs) – optional, enable and select additional OGs if desired
- Message type – None
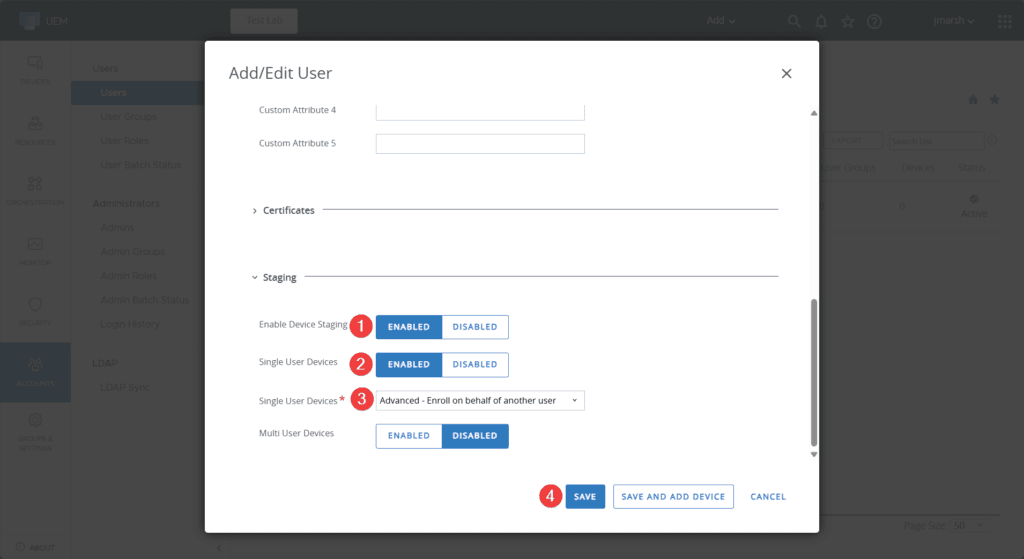
- Scroll up to the top and select the Advanced Tab
- Scroll down and expand the Staging section
- Set Enable Device Staging to Enabled
- Set Single User Devices to Enabled
- Set the dropdown box labelled Single User Devices to Advanced – Enroll on behalf of another user
- Click Save
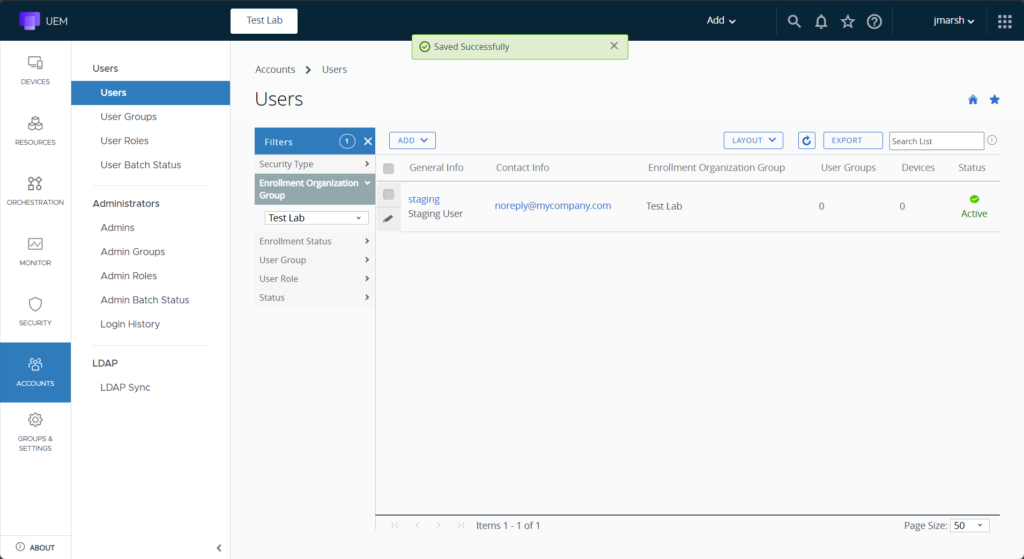
- If all mandatory fields have been completed, the account will be saved and you’ll return to the User list view with the new staging account you’ve just created visible in the list.
That’s it – you’ve now created a staging user!